Recipe: No-yeast dough produces a light citrusy treat
|
Rainy or foggy or just overcast, January is usually bleak. Thank goodness for citrus, which brightens up our gardens and our kitchens.
I love to use my navel oranges in baking this time of year, and I'm always on the lookout for different recipes for breakfast treats. This recipe for orange rolls was contributed to Food52.com by Posie Harwood Brien, who says her mother would make it for special-occasion weekend breakfasts.
Making the rolls is not as fast as making muffins or pancakes, so I see why Posie's mom saved it for certain weekends. But the rolls come together pretty quickly, since the ingredient list is short and there's no yeast involved. The dough is like a sweet biscuit, and the orange filling is not tricky. If you've made scones, this will be an easy next step.
And now that I've made this, I'm thinking of other citrus to try with the dough. The orange is straightforward, but combinations could boost the sweet-tart factor. (Notice I added a bit of lime juice to the orange juice, and could have gone with more.) Lemon-lime next, or maybe blood orange-grapefruit? A bit of zest or a spice in the dough also might be fun. Citrus season has several months left, so there's time.

|
Orange breakfast rolls
Adapted from Food52.com
Makes 12-15
Ingredients:
Filling:
6 tablespoons unsalted butter
3 tablespoons unbleached all-purpose flour
2 tablespoons (or more) orange zest, from 2 large oranges
1/3 cup freshly squeezed orange juice (plus a squirt of lime juice if you have any, optional)
1/2 cup granulated sugar
Dough:
3 tablespoons unsalted butter, cut into 1/2-inch chunks and chilled
2 cups unbleached all-purpose flour
1 tablespoon plus 1 teaspoon baking powder
1/2 teaspoon salt
1 cup cold milk, dairy or nondairy
Instructions :
To make the filling, melt the 6 tablespoons butter in a medium saucepan (preferably nonstick) over medium heat. As soon as it is melted, whisk in the 3 tablespoons flour, blending until smooth. Then stir in the orange zest and the juice, cooking until the mixture thickens, 1 or 2 minutes.
Remove the filling from the heat and stir in the sugar until it dissolves. The filling will become more translucent, like lemon curd. Set it aside to cool.
If you haven't already done so, pop the 3 tablespoons of butter, in chunks, into the freezer to chill for a bit.
Preheat the oven to 400 degrees. Prepare a 9-by-9-inch baking pan or 12-cup muffin tin by thoroughly greasing it. (A muffin tin will give you rolls with crispier edges, while the baking pan will produce softer edges on the rolls.)
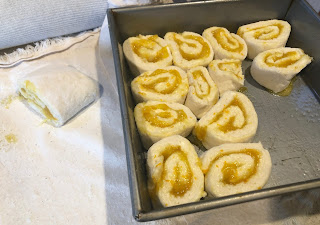
\Don't worry if the rolls don't quite fill the pan --
they will puff up during bakng. |
To make the dough, measure the flour into a large bowl, and whisk in the baking powder and the salt. Cut the chilled butter into the flour mixture with a pastry blender or two knives, until there are only pea-sized lumps.
Stir the milk into the flour-butter mixture with a fork just until the dough begins to come together. Turn the dough out onto a well-floured cloth or countertop and knead it gently until the dough is smooth. (Some chunks of butter will be visible, but that's normal.)
Roll the dough into a rectangle, about 15 inches by 10 inches and about 1/4-inch thick. Reserve 1/2 cup of the filling, and spread the rest on the rectangle, leaving a narrow strip of uncovered dough on all four sides.
Starting on one long edge, carefully roll the dough into a log. Pinch the seam closed to keep filling from spilling out. Using a serrated knife or piece of unflavored dental floss, cut the log into even slices, 12 for the muffin tin or up to 15 for the baking pan (I wound up with 14).
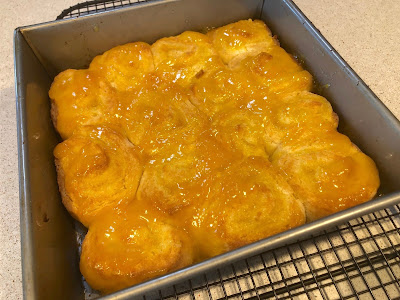
Place each slice gently into the prepared pan. Bake 18-20 minutes until the tops are consistently golden brown.
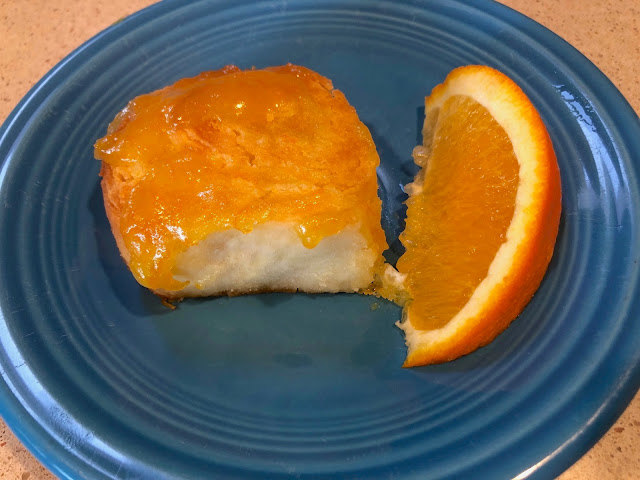
Remove from the oven and run a knife around the edge to prevent sticking. Let cool a few minutes, then drizzle with the reserved filling and serve.
|
Comments
0 comments have been posted.Sacramento Digs Gardening to your inbox.
Food in My Back Yard Series
May 6: Maintain soil moisture with mulch for garden success
April 29: What's (already) wrong with my tomato plants?
April 22: Should you stock up on fertilizer? (Yes!)
April 15: Grow culinary herbs in containers
April 8: When to plant summer vegetables
April 1: Don't be fooled by these garden myths
March 25: Fertilizer tips: How to 'feed' your vegetables for healthy growth
March 18: Time to give vegetable seedlings some more space
March 11: Ways to win the fight against weeds
March 4: Potatoes from the garden
Feb. 25: Plant a fruit tree now -- for later
Feb. 18: How to squeeze more food into less space
Feb. 11: When to plant? Consider staggering your transplants
Feb. 4: Starting in seed starting
Local News

Thanks to Our Sponsor!

Sites We Like
Garden Checklist for week of May 11
Make the most of the lower temperatures early in the week. We’ll be back in the 80s by Thursday.
* Plant, plant, plant! It’s prime planting season in the Sacramento area. Time to set out those tomato transplants along with peppers and eggplants. Pinch off any flowers on new transplants to make them concentrate on establishing roots instead of setting premature fruit.
* Direct-seed melons, cucumbers, summer squash, corn, radishes, pumpkins and annual herbs such as basil.
* Harvest cabbage, lettuce, peas and green onions.
* In the flower garden, direct-seed sunflowers, cosmos, salvia, zinnias, marigolds, celosia and asters. (You also can transplant seedlings for many of the same flowers.)
* Plant dahlia tubers.
* Transplant petunias, marigolds and perennial flowers such as astilbe, columbine, coneflowers, coreopsis, dahlias, rudbeckia and verbena.
* Keep an eye out for slugs, snails, earwigs and aphids that want to dine on tender new growth.
* Feed summer bloomers with a balanced fertilizer.
* For continued bloom, cut off spent flowers on roses as well as other flowering plants.
* Add mulch to the garden to maintain moisture. Mulch also cuts down on weeds. But don’t let it mound around the stems or trunks of trees or shrubs. Leave about a 6-inch-to-1-foot circle to avoid crown rot or other problems.
* Remember to weed! Pull those nasties before they set seed.
* Water early in the day and keep seedlings evenly moist.
 Subscribe
 Powered by California Local


