Recipe: Chai pumpkin muffins are spiced, not too sweet
 |
| Chai tea adds spice to pumpkin muffins, great for a fall breakfast. (Photos: Kathy Morrison) |
Holiday season for me always feels like the down side of a huge rollercoaster hill: exhilarating in its way but moving so fast you don't have time to look at the scenery.
So before Halloween turns into ThanksgivingChristmasNewYears, and everyone gives up pumpkin spice for peppermint, let's celebrate fall with something made from actual pumpkin.
You know, don't you, that a lot of canned "pumpkin" --- as lovely as it is -- isn't real pumpkin. It's winter squash such as Hubbard; it's OK under USDA labeling rules to call it pumpkin. The Libby's folks put pumpkin in their cans, but it's a particular variety called Dickinson that resembles a bloated butternut squash. ( Here's one source if you want to grow one next year.) This is why pumpkin pie baked with your own pumpkin never tastes quite like you expect: Your tastebuds are used to the other stuff.
This recipe will work with either canned or cooked-it-yourself pumpkin, or even squash, and it will taste delicious. (See below for ways to cook a pumpkin, if you've never done it before.)
|
Chai pumpkin muffins
Makes 12
Ingredients:
1 or 2 chai tea bags
1/2 cup milk, dairy or nondairy
3/4 cup unbleached all-purpose flour
3/4 cup whole wheat flour
1/2 cup oat bran
1 teaspoon baking powder
1/2 teaspoon baking soda
1/4 teaspoon salt
2 teaspoons mixed pie spices (I used 1-1/2 teaspoons pumpkin pie spice -- which is cinnamon, nutmeg, cloves and ginger -- plus an additional 1/2 teaspoon ginger, but blend to your taste)
1 cup pumpkin puree
2 eggs
1/3 cup maple syrup or honey
3 tablespoons vegetable oil
1-1/2 teaspoons vanilla extract
Optional mix-ins: 3/4 cup mini chocolate chips, chopped walnuts or chopped dried cranberries
Coarse sugar, for sprinkling on top
Instructions:
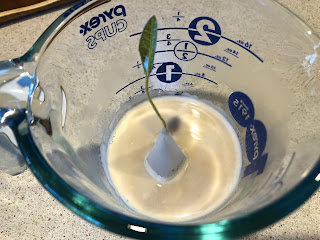
Heat the oven to 350 degrees. Spray a 12-cup muffin pan with oil spray. Heat the milk in the microwave (in a heatproof container) or in a saucepan on the stove until the milk is hot but not boiling. Steep the tea bag or bags in the milk for 5 to 10 minutes, although longer is not a problem. Set the milk aside to cool. Remove the tea bag.
Stir the dry ingredients together in a medium bowl. In another bowl or measuring cup, stir the pumpkin briefly to make sure it’s smooth. Crack the eggs into a large bowl, beat lightly, then stir in the pumpkin and maple syrup or honey. Add the oil, then the vanilla.
Alternately add half the dry mixture and half the milk to the pumpkin mixture, then the other half of each. Stir just until all the flour is incorporated; muffins require a light hand. If using a mix-in, stir it in now just until distributed through the batter.
Divide the batter among the prepared muffin cups. Sprinkle with coarse sugar if desired. Bake for 22-27 minutes until a toothpick comes out clean and tops are lightly brown. (These muffins don’t brown much.) Serve warm, or freeze and reheat in the microwave.
How to cook a fresh pumpkin
First, you're better off cooking something small. (The pumpkin in the photo at the top is just over 3 pounds). And even better, if it's a sugar or “pie pumpkin," it will be a little sweeter and less stringy. I've cooked jack o'lantern-size pumpkins, and they are a disappointment if you want to bake with the puree.
Method 1: Heat oven to 375 degrees. Cut the pumpkin in half vertically and remove the stem, seeds and stringy bits. Put 1/2 cup water in the bottom of a baking dish that will hold both halves flat. Put the halves in the dish, cut side down. Cover dish tightly with foil. Bake for at least 1 hour, or until the pumpkin is tender and can be pierced easily with a knife, depending on the size. Remove from oven, let cool, remove skin and mash the flesh. It can be frozen for later use.
Method 2: The microwave method is similar, but the pumpkin should be cut into smaller pieces and can be slightly piled in a microwave-safe dish to fit. Use the water, but cover the dish with plastic wrap instead of foil. Cook on High until flesh is tender.
Comments
0 comments have been posted.Sacramento Digs Gardening to your inbox.
Food in My Back Yard Series
April 29: What's (already) wrong with my tomato plants?
April 22: Should you stock up on fertilizer? (Yes!)
April 15: Grow culinary herbs in containers
April 8: When to plant summer vegetables
April 1: Don't be fooled by these garden myths
March 25: Fertilizer tips: How to 'feed' your vegetables for healthy growth
March 18: Time to give vegetable seedlings some more space
March 11: Ways to win the fight against weeds
March 4: Potatoes from the garden
Feb. 25: Plant a fruit tree now -- for later
Feb. 18: How to squeeze more food into less space
Feb. 11: When to plant? Consider staggering your transplants
Feb. 4: Starting in seed starting
Local News

Thanks to Our Sponsor!

Sites We Like
Garden Checklist for week of May 4
Enjoy this spring weather – and get gardening!
* Plant, plant, plant! It’s prime planting season in the Sacramento area. Time to set out those tomato transplants along with peppers and eggplants. Pinch off any flowers on new transplants to make them concentrate on establishing roots instead of setting premature fruit.
* Direct-seed melons, cucumbers, summer squash, corn, radishes, pumpkins and annual herbs such as basil.
* Harvest cabbage, lettuce, peas and green onions.
* In the flower garden, direct-seed sunflowers, cosmos, salvia, zinnias, marigolds, celosia and asters. (You also can transplant seedlings for many of the same flowers.)
* Plant dahlia tubers. Other perennials to set out include verbena, coreopsis, coneflower and astilbe.
* Transplant petunias, marigolds and perennial flowers such as astilbe, columbine, coneflowers, coreopsis, dahlias, rudbeckia and verbena.
* Keep an eye out for slugs, snails, earwigs and aphids that want to dine on tender new growth.
* Feed summer bloomers with a balanced fertilizer.
* For continued bloom, cut off spent flowers on roses as well as other flowering plants.
* Add mulch to the garden to maintain moisture. Mulch also cuts down on weeds. But don’t let it mound around the stems or trunks of trees or shrubs. Leave about a 6-inch to 1-foot circle to avoid crown rot or other problems.
 Powered by California Local


