Recipe: Honey-poached pears spiced with cloves
 |
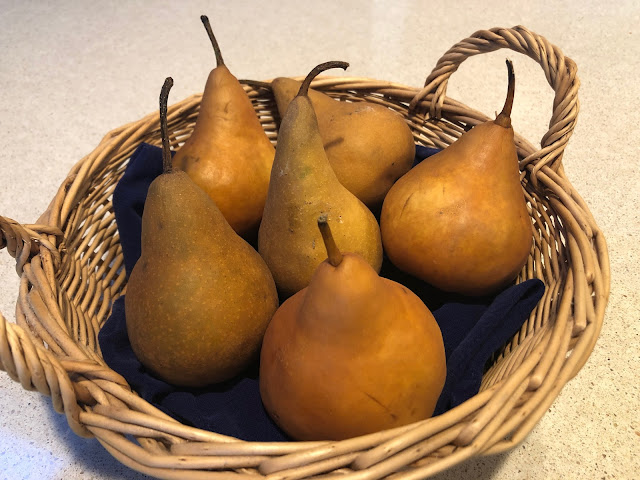
| Bosc pears are perfect for a simple poaching in a honey syrup. (Photos: Kathy Morrison) |
As much as I love to bake with seasonal fruit in fall, sometimes I want to enjoy it as simply prepared as possible. That's especially true with pears, which get crowded out of the fall limelight by apples and all that pumpkin spice whatever.
Pears are picked when still hard, so buy them a few days before you plan to use them. They ripen from the inside out, so test the flesh right near the stem; it should feel just slightly soft. Bartletts ripen fastest, I've found, followed by the d'Anjou variety. Bosc pears are a little drier and grittier, but hold together well, so they're good for a dish like this.
This recipe is adapted from one by the late great James Beard in his "American Cookery." This classic cookbook is the first place I go when I want to find a solid basic recipe. I used local honey instead of the 1-1/2 cups of white sugar the original calls for, and it's still plenty sweet. Adjust the spice to your preference; I considered using nutmeg or cardamom instead of the cloves. Cinnamon would work too, of course.
Serve the pears alone, in their syrup, or with crème fraîche, heavy cream or crème anglaise.
Honey-poached pears
Serves 6

|
Ingredients:
6 ripe but still firm pears, such as Bosc or d'Anjou
2 cups water
1/3 cup honey
1 teaspoon vanilla extract
1/8 to 1/4 teaspoon ground cloves (or nutmeg, cardamom or cinnamon)
Instructions:
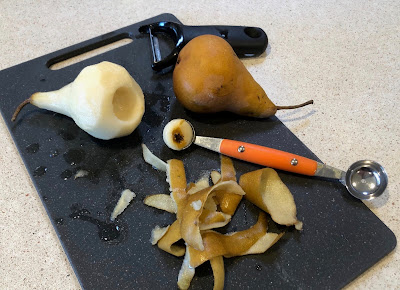
Peel the pears, leaving them whole with the stem. Use a melon ball cutter or a paring knife to core the pears from the bottom.
Bring the water, honey, vanilla extract and cloves to a boil in a 4-quart nonstick pot. Add the pears upright. (They may fall over; it's OK.) Reduce heat, cover the pot and cook gently for about 15 minutes, until the pears test done with the tip of a knife. If they've fallen over, roll the pears around so that all sides spend some time cooking in the liquid.
Remove the pot from the heat, and let the pears cool in the liquid with the lid on. Serve warm, at room temperature or chilled, plain or with desired accompaniment.
Comments
0 comments have been posted.Sacramento Digs Gardening to your inbox.
Food in My Back Yard Series
April 29: What's (already) wrong with my tomato plants?
April 22: Should you stock up on fertilizer? (Yes!)
April 15: Grow culinary herbs in containers
April 8: When to plant summer vegetables
April 1: Don't be fooled by these garden myths
March 25: Fertilizer tips: How to 'feed' your vegetables for healthy growth
March 18: Time to give vegetable seedlings some more space
March 11: Ways to win the fight against weeds
March 4: Potatoes from the garden
Feb. 25: Plant a fruit tree now -- for later
Feb. 18: How to squeeze more food into less space
Feb. 11: When to plant? Consider staggering your transplants
Feb. 4: Starting in seed starting
Sites We Like
Garden Checklist for week of May 4
Enjoy this spring weather – and get gardening!
* Plant, plant, plant! It’s prime planting season in the Sacramento area. Time to set out those tomato transplants along with peppers and eggplants. Pinch off any flowers on new transplants to make them concentrate on establishing roots instead of setting premature fruit.
* Direct-seed melons, cucumbers, summer squash, corn, radishes, pumpkins and annual herbs such as basil.
* Harvest cabbage, lettuce, peas and green onions.
* In the flower garden, direct-seed sunflowers, cosmos, salvia, zinnias, marigolds, celosia and asters. (You also can transplant seedlings for many of the same flowers.)
* Plant dahlia tubers. Other perennials to set out include verbena, coreopsis, coneflower and astilbe.
* Transplant petunias, marigolds and perennial flowers such as astilbe, columbine, coneflowers, coreopsis, dahlias, rudbeckia and verbena.
* Keep an eye out for slugs, snails, earwigs and aphids that want to dine on tender new growth.
* Feed summer bloomers with a balanced fertilizer.
* For continued bloom, cut off spent flowers on roses as well as other flowering plants.
* Add mulch to the garden to maintain moisture. Mulch also cuts down on weeds. But don’t let it mound around the stems or trunks of trees or shrubs. Leave about a 6-inch to 1-foot circle to avoid crown rot or other problems.