
Recipe: Fresh fruit tops easy cheesecake bar
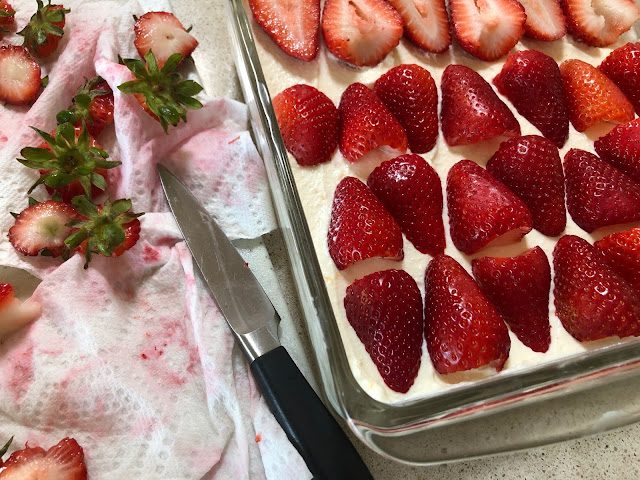 |
| Fresh strawberries brighten this no-bake cheesecake bar. Blot the halves before topping the filling. (Photos: Kathy Morrison) |
 |
|
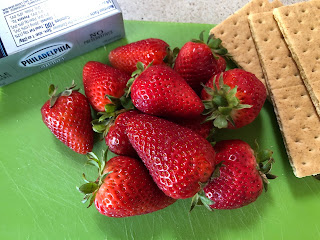
Berries, cream cheese and graham crackers are the main
ingredients in this dessert.
|
Cooking strawberries seems like a crime this time of year, when the fruit is plump and fragrant, fresh from picking.
Eating them plain is a treat, of course, but featuring strawberries in dessert seems like the best salute to spring. Shortcake is a popular option, but there's so much biscuit involved -- the berries always seem to get lost in it. I like this no-bake cheesecake bar better: It feels special, without a lot of work (or heating up the kitchen).
When buying berries, look for shiny fruit and a waft of strawberry fragrance -- that guarantees that they'll be fresh and fully ripe.
This not-too-sweet recipe is adapted from a Mark Bittman dessert that uses fresh whole blueberries, so feel free to substitute any in-season berry here.
No-bake strawberry cheesecake bars
Serves 8 to 12
 |
|
Firmly press in the crumbs with a glass
or cup.
|
Ingredients :
1-1/2 cups graham cracker crumbs (from about 12 whole graham crackers)
1/3 cup pecan or walnut pieces, optional
5 tablespoons melted butter (use 6 tablespoons if you are using the nuts)
8 ounces cream cheese (brick kind, not whipped or soft), room temperature
1 cup whole-milk ricotta cheese, drained if it seems watery
3 tablespoons agave sweetener or honey, or to taste
Zest from 1 lemon
1/2 teaspoon lemon juice
Pinch of salt
1 generous pint of fresh strawberries (I used 14 medium-to-large berries)
Instructions:
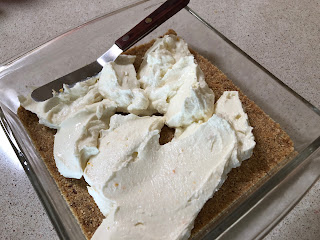 |
| Place big dollops of cheese filling on the crust, then spread it out. |
If they're not already crumbs, grind the graham crackers fine in a food processor or blender, including the nuts if using them. Stir the melted and slightly cooled butter into the crumbs until fully blended. Using a flat-bottomed glass or measuring cup, firmly press the mixture into an 8- or 9-inch square pan (glass preferred). Chill crust in the refrigerator while making the cheese filling.
In a mixing bowl, combine the cream cheese, ricotta, agave or honey, lemon zest, lemon juice and salt. A standing or hand mixer will give this is a nice fluffy texture, but stirring a lot by hand also works. Blend until smooth.
Remove the crust from the refrigerator and spoon large dollops of cheese mixture onto the crust -- this will make it easier to spread without picking up stray crumbs. Use an offset spatula or a knife to smooth the cheese filling evenly over the crust. Return the pan to the refrigerator for at least 30 minutes.
To prepare the fruit, wash the berries thoroughly and pat dry with a paper or cloth towel. When the filling is chilled, hull the berries and cut them in half. Blot each cut berry half on a paper towel before placing it on the cheese filling (see photo at top of post). This will help keep the berries from weeping juice onto the filling.
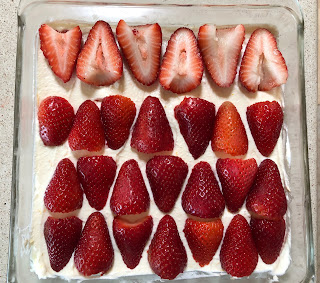 |
| One row berry cut-side up, but I prefer cut-side down. |
I did try one row of berry halves cut side up, and that's an option, but I like the look of the dessert with the cut side down.
Chill for another hour. The cheese filling will set but remain creamy. Carefully cut into bars or squares to serve. (Using a sharp knife and a spatula the desired width of the bar works well.) This dessert is best consumed on the day it's made, but will keep in the refrigerator for another day or so.
Comments
0 comments have been posted.Sacramento Digs Gardening to your inbox.
Food in My Back Yard Series
May 6: Maintain soil moisture with mulch for garden success
April 29: What's (already) wrong with my tomato plants?
April 22: Should you stock up on fertilizer? (Yes!)
April 15: Grow culinary herbs in containers
April 8: When to plant summer vegetables
April 1: Don't be fooled by these garden myths
March 25: Fertilizer tips: How to 'feed' your vegetables for healthy growth
March 18: Time to give vegetable seedlings some more space
March 11: Ways to win the fight against weeds
March 4: Potatoes from the garden
Feb. 25: Plant a fruit tree now -- for later
Feb. 18: How to squeeze more food into less space
Feb. 11: When to plant? Consider staggering your transplants
Feb. 4: Starting in seed starting
Sites We Like
Garden Checklist for week of May 11
Make the most of the lower temperatures early in the week. We’ll be back in the 80s by Thursday.
* Plant, plant, plant! It’s prime planting season in the Sacramento area. Time to set out those tomato transplants along with peppers and eggplants. Pinch off any flowers on new transplants to make them concentrate on establishing roots instead of setting premature fruit.
* Direct-seed melons, cucumbers, summer squash, corn, radishes, pumpkins and annual herbs such as basil.
* Harvest cabbage, lettuce, peas and green onions.
* In the flower garden, direct-seed sunflowers, cosmos, salvia, zinnias, marigolds, celosia and asters. (You also can transplant seedlings for many of the same flowers.)
* Plant dahlia tubers.
* Transplant petunias, marigolds and perennial flowers such as astilbe, columbine, coneflowers, coreopsis, dahlias, rudbeckia and verbena.
* Keep an eye out for slugs, snails, earwigs and aphids that want to dine on tender new growth.
* Feed summer bloomers with a balanced fertilizer.
* For continued bloom, cut off spent flowers on roses as well as other flowering plants.
* Add mulch to the garden to maintain moisture. Mulch also cuts down on weeds. But don’t let it mound around the stems or trunks of trees or shrubs. Leave about a 6-inch-to-1-foot circle to avoid crown rot or other problems.
* Remember to weed! Pull those nasties before they set seed.
* Water early in the day and keep seedlings evenly moist.